Uploading data to Lentiq via SFTP
Lentiq has multiple data ingestion options tailored to different data volumes. The data is stored in object storage.
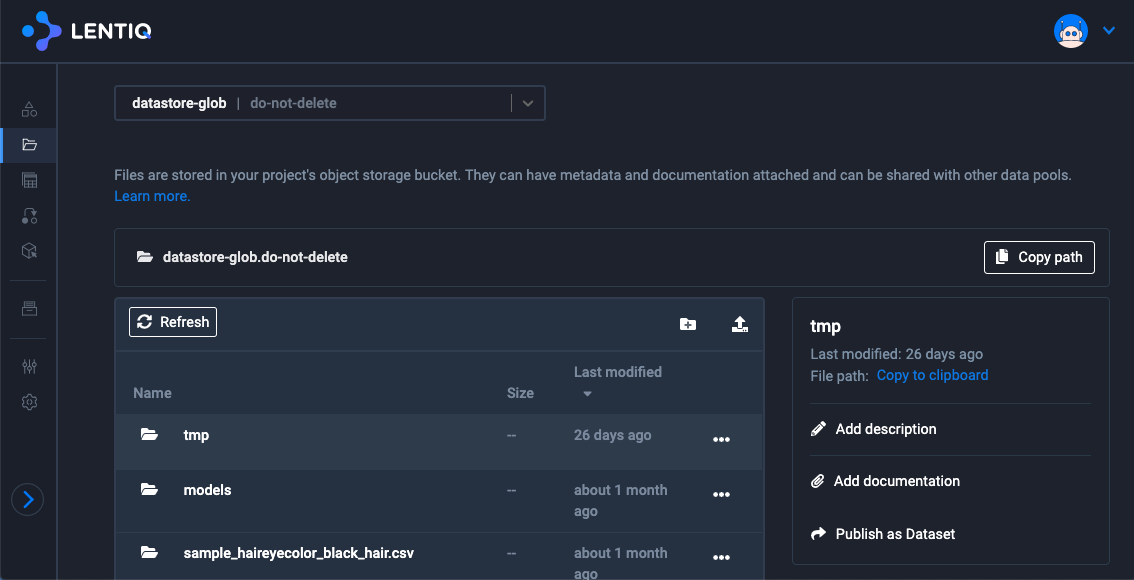
Via the file browser
- The simplest and easiest way to upload some data to your data pool is to use Lentiq's file browser.
- Ingest bigger files using a SFTP client through our SFTP Proxy application.
Via CURL
Ingest bigger files using a simple cURL command from your Unix-based terminal:
curl -X PUT -H "Content-Type: multipart/form-data" -H "X-DestinationPath: <enter-your-destination-path>" -H "Authorization: APIKEY <insert-your-api-key>" -F "file=@authentication.log" https://api.lentiq.com/api/v1/datamanagement/obj/upload/b/<enter-your-data-pool-name>.<enter-your-project-name>
- <enter-your-destination-path> - example /destination.csv
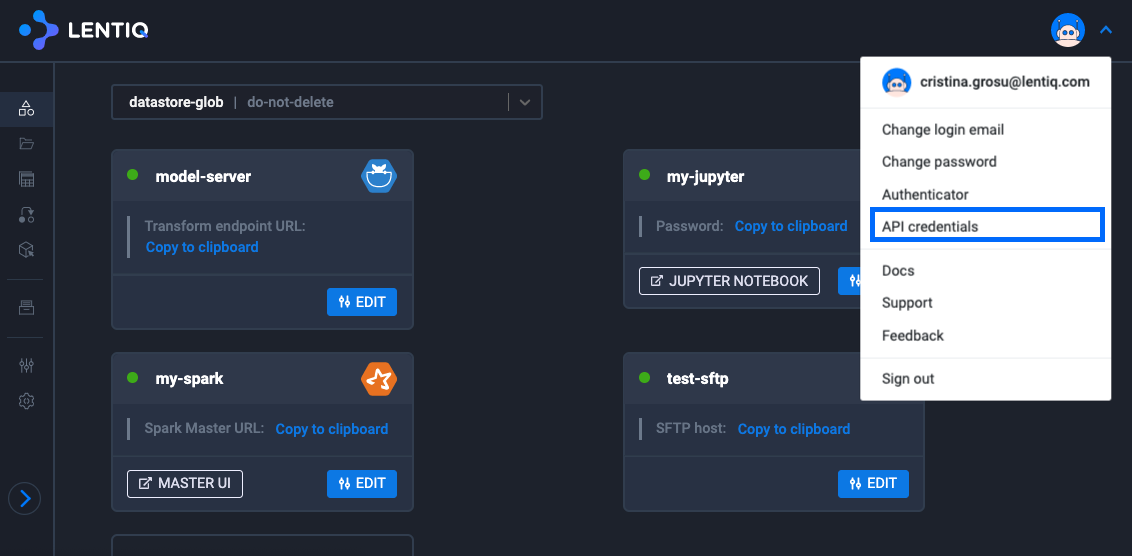
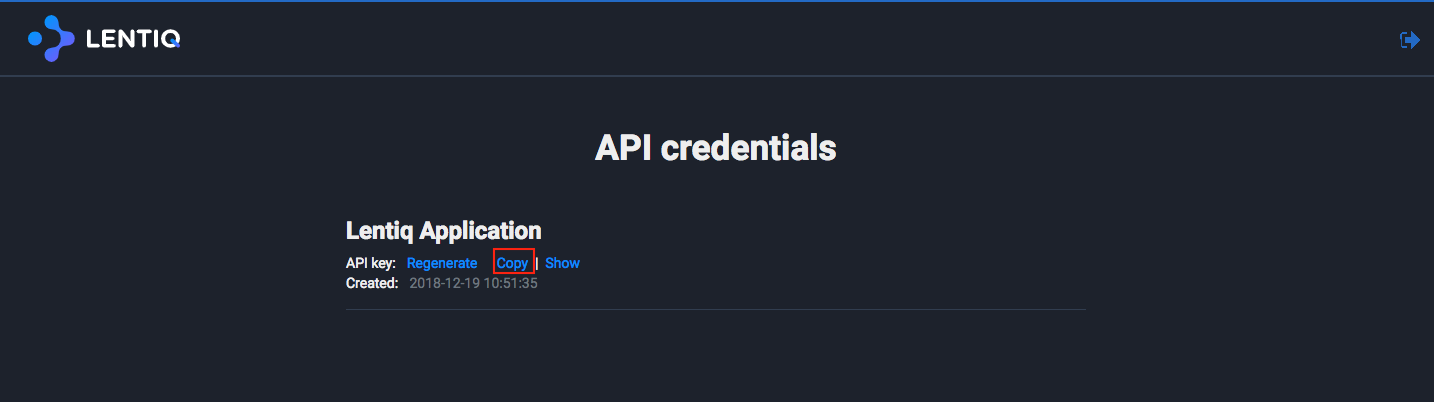
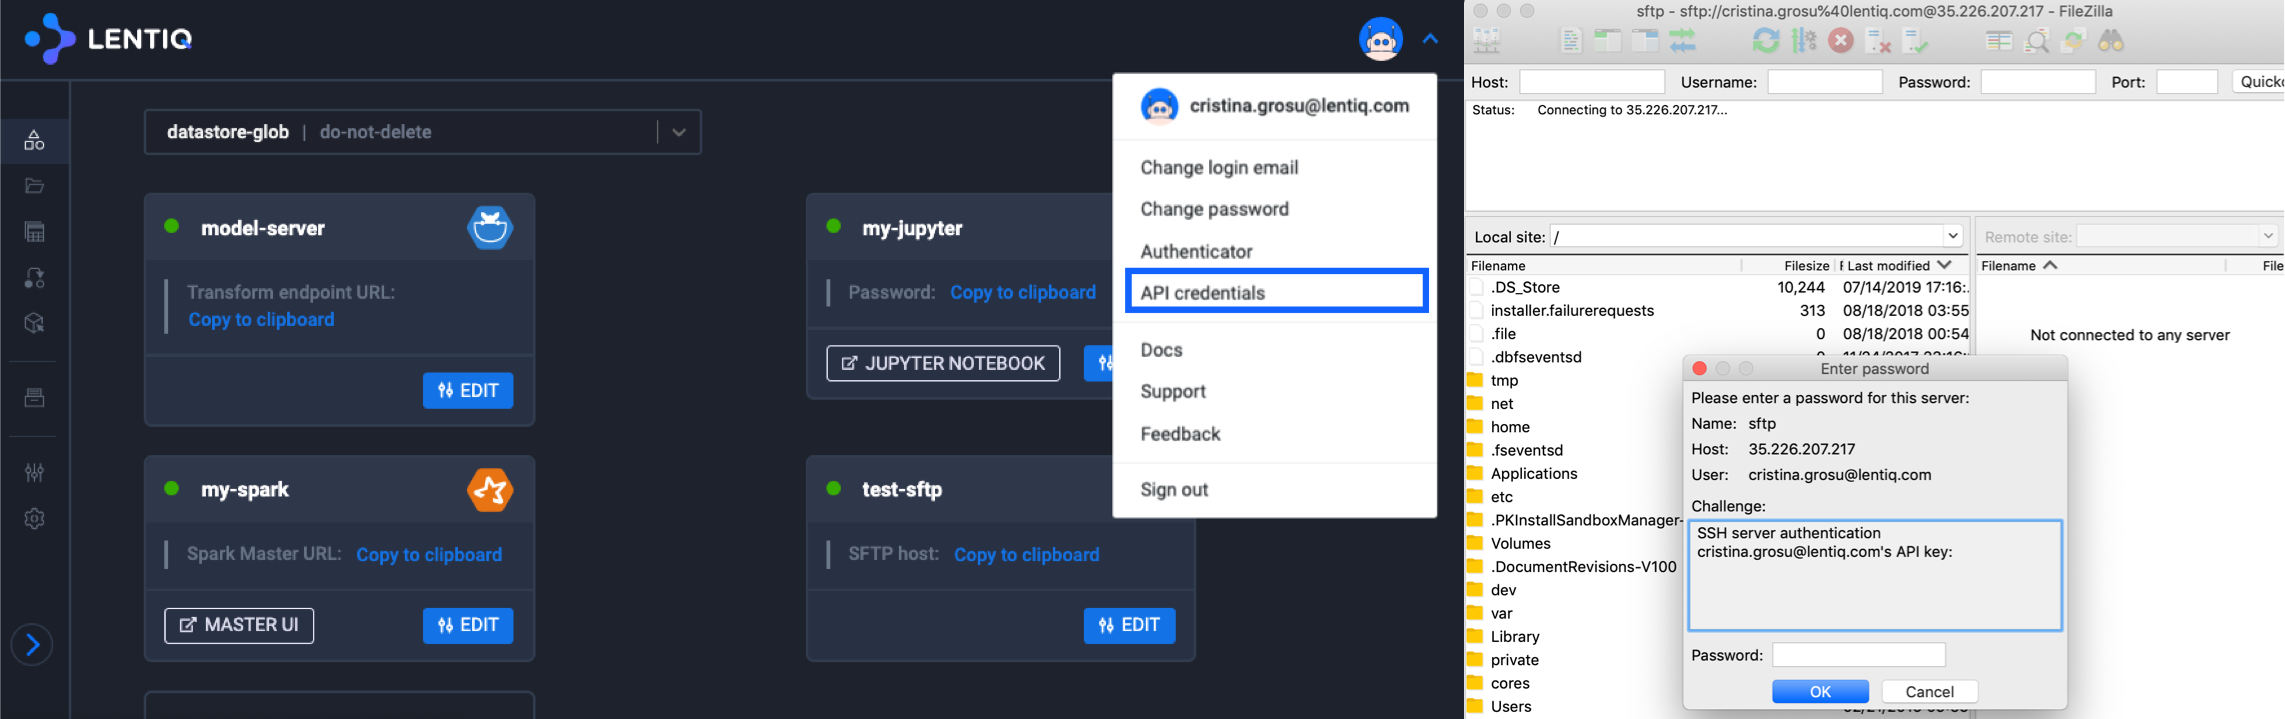
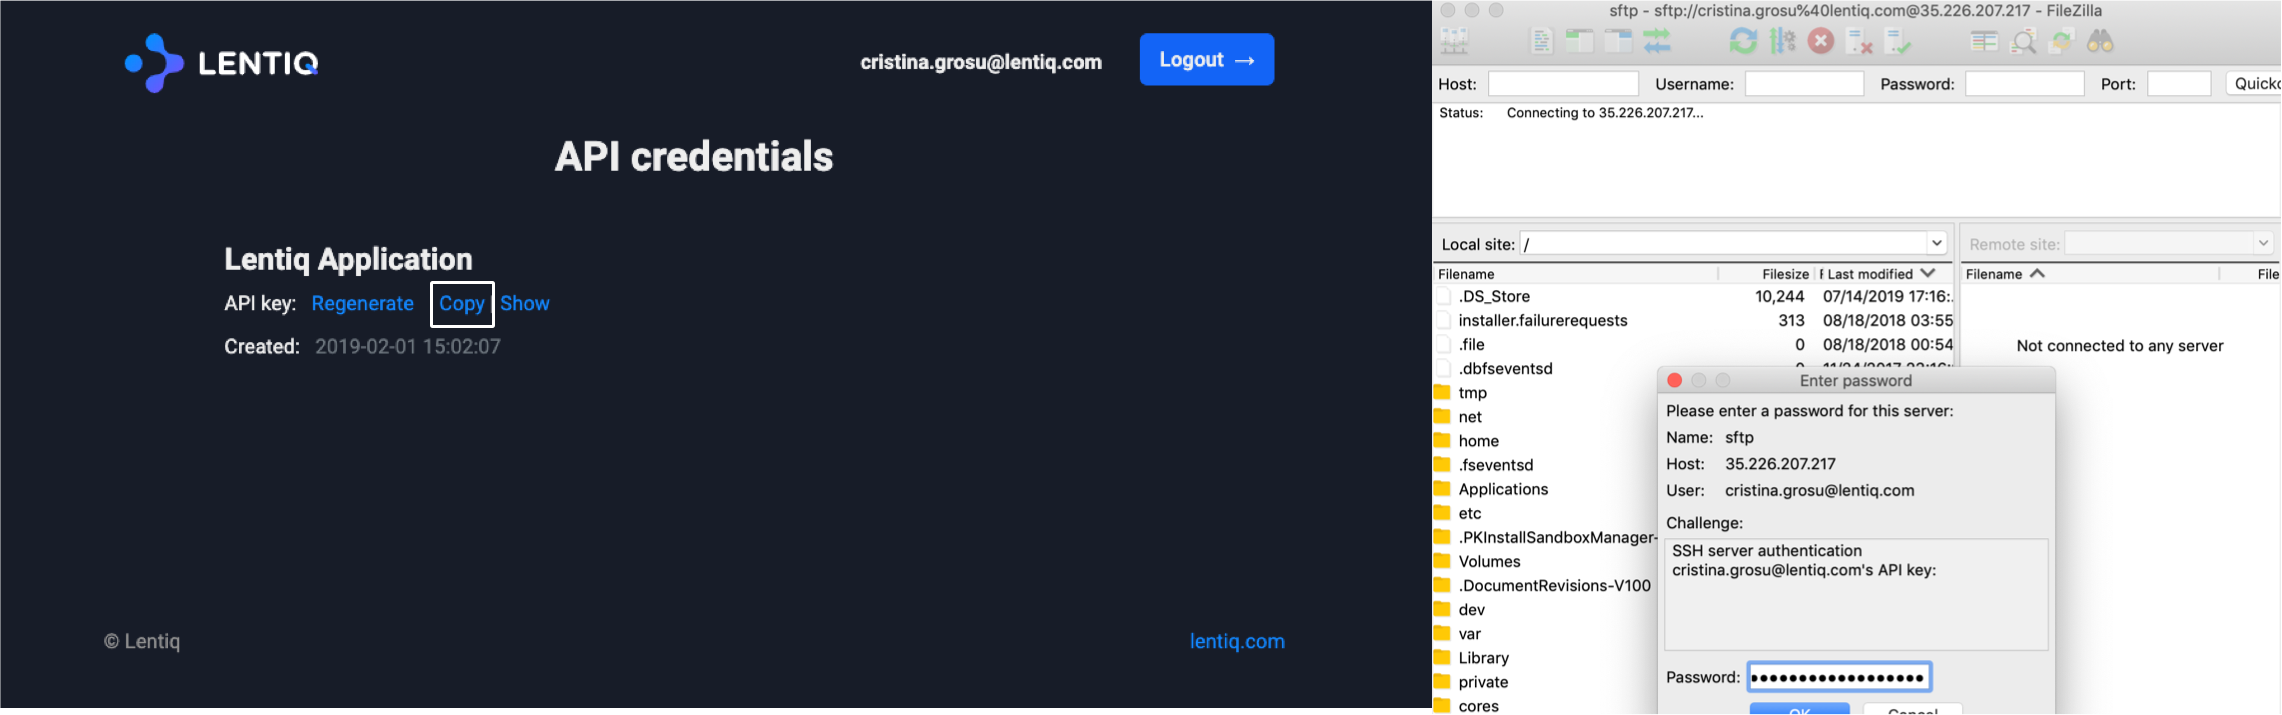
- <insert-your-api-key> - your API key can be retrieved from the User settings > API credentials menu.
- <enter-your-data-pool-name> - the name of your data pool.
- <enter-your-project-name> - the name of your project.
Via the SFTP Proxy application
You need to have a data pool and a project up and running on Lentiq in order to create a SFTP application, and you need to have a project quota that can allow you to add a new application.
We recommend to keep your SFTP Proxy application up and running only for the timeframe during which you upload your data.
Create a SFTP Proxy application, following the 'Deploying applications and processing clusters' guide.
After the SFTP Proxy application has been created, check the SFTP Proxy connection URL from the SFTP Proxy application widget.
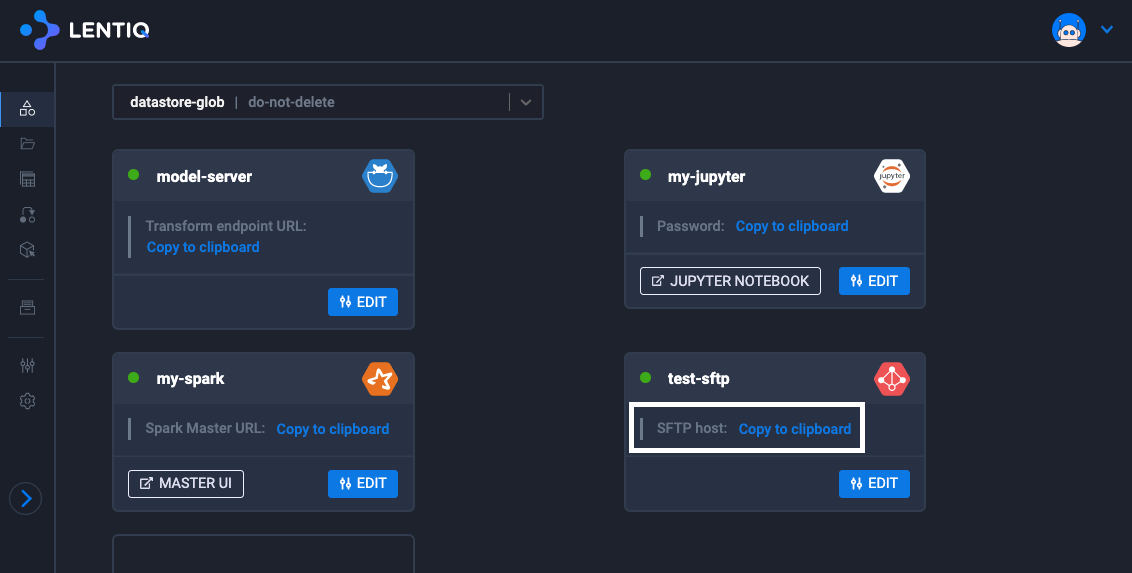
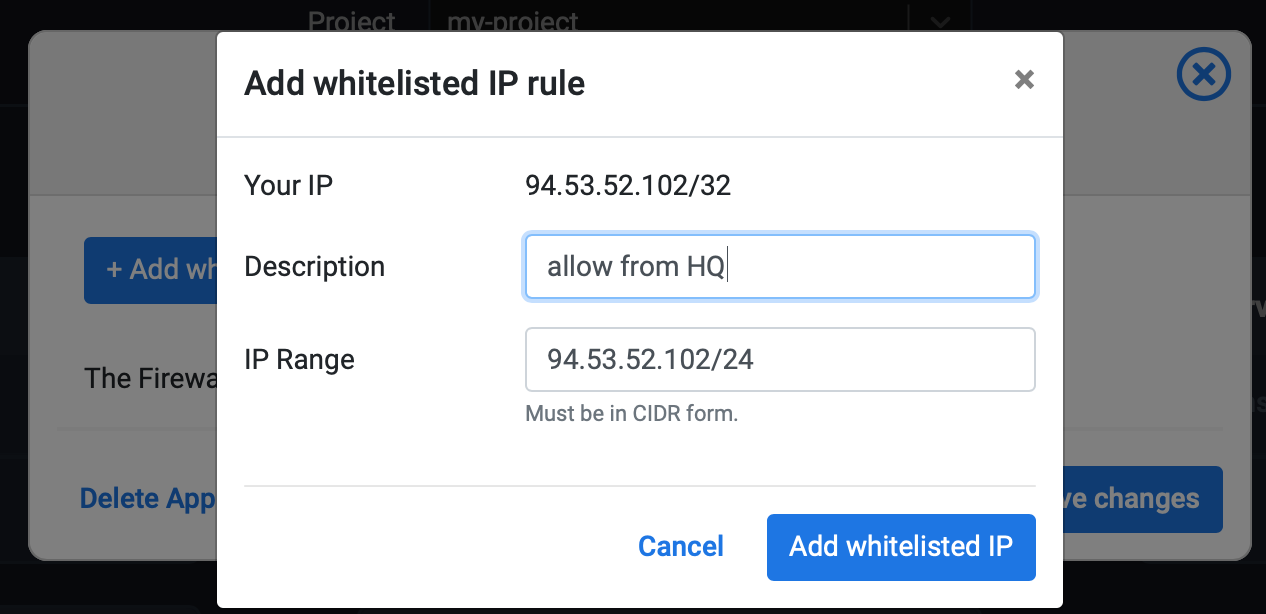
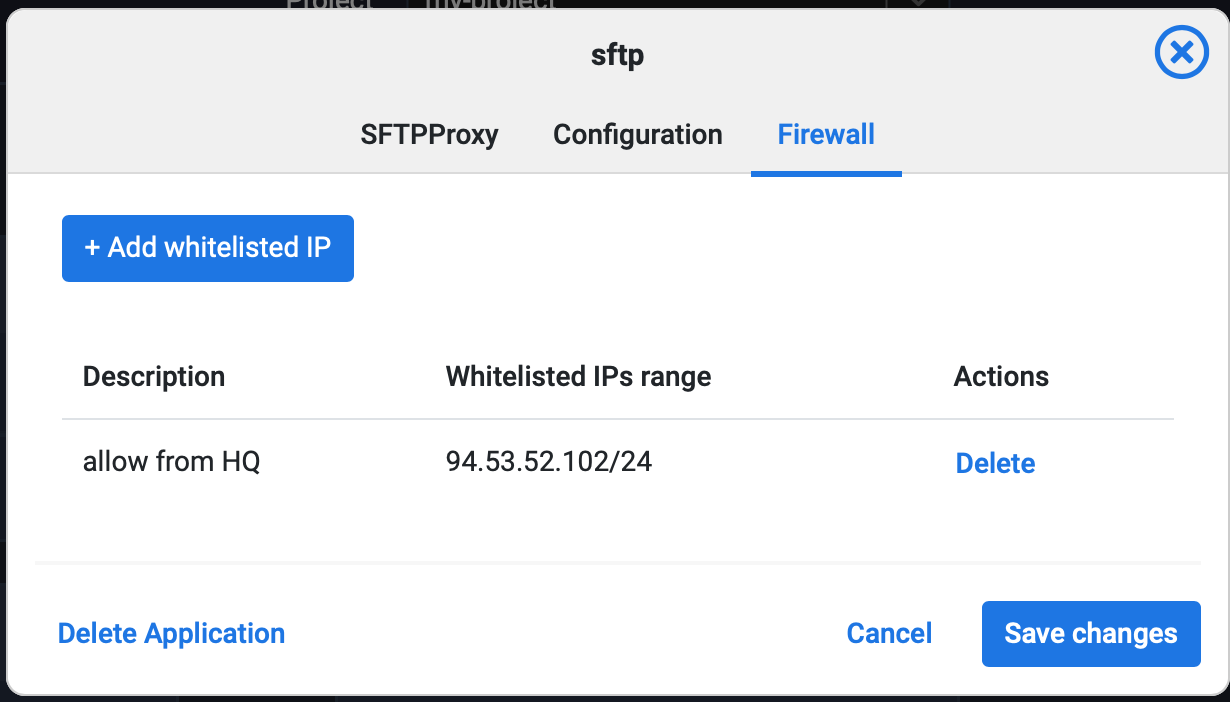
Make sure your IP has been added to the SFTP's firewall.
Setup your local SFTP client and upload the data
In order to connect to the remote SFTP Proxy application you need to have a SFTP client configured. The setup is different depending on the local operating system.
MacOS / Unix based operating systems
On MacOS/Unix based operating systems you can use the Terminal application or any other SFTP client. You should have SFTP installed by default. If you don't, make sure you install it before proceeding. It is usually embedded in the SSH/OPENSSH operating system packages.
Once you have the client installed you can use your Lentiq user account email address and SFTP Proxy connection string to connect your local SFTP client to the remote SFTP Proxy and begin uploading your data.
Create the initial SFTP connection

Enter the API key. You can find your Lentiq API key in the user settings menu.
Copy your API key and paste it into the terminal:
Once connected to the SFTP Proxy you can explore the commands exposed by the service.
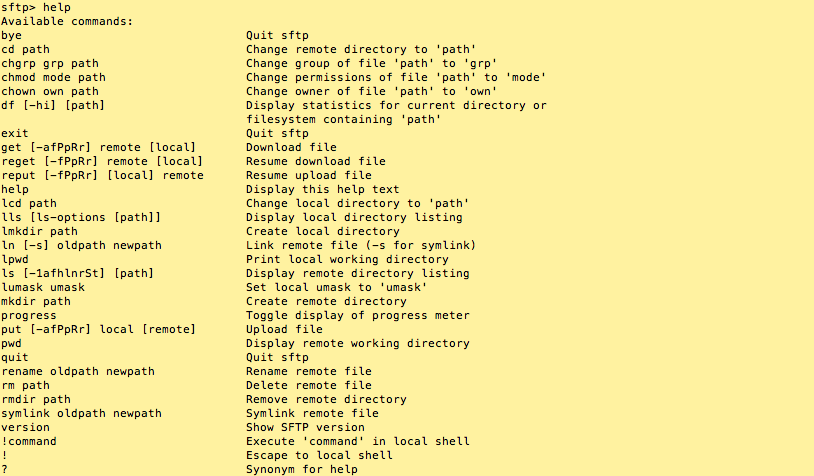
Upload a local file to the remote object storage system.

Check to see if the file was uploaded successfully.

You can also see the file in the Lentiq file browser.
Windows
On Windows you can use WinSCP or any other SFTP client. Make sure a client is installed before proceeding.
Once you have the client installed you can use your Lentiq user account email address and SFTP Proxy connection string to connect your local SFTP client to the remote SFTP Proxy and begin uploading your data.
Create the initial SFTP connection.
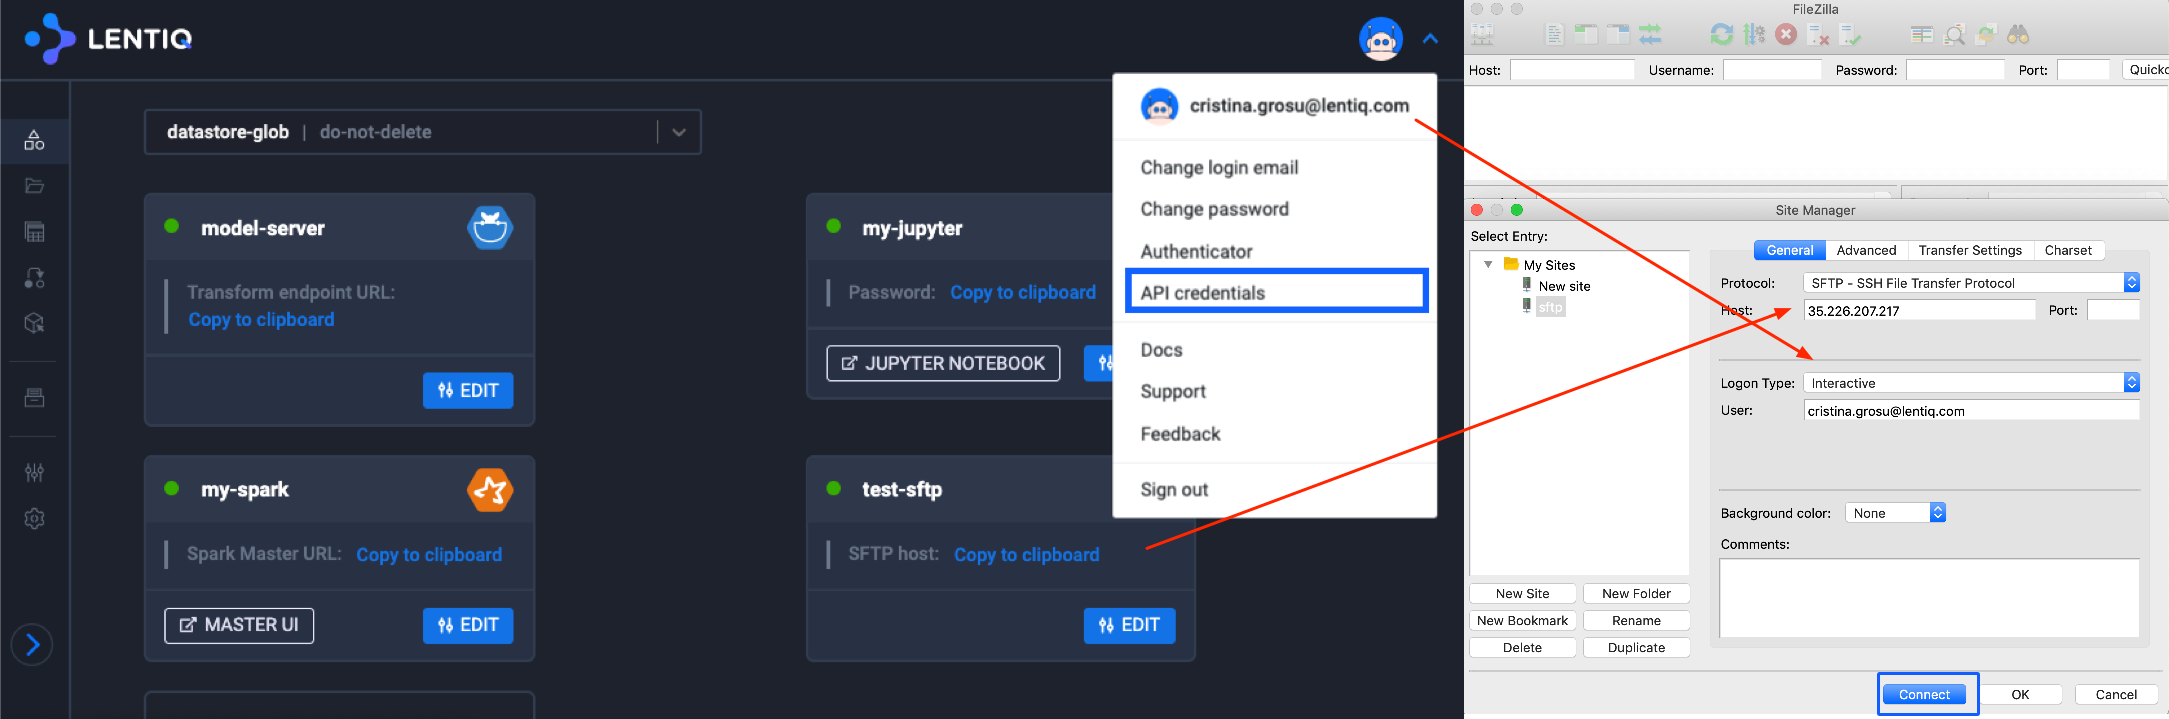
Enter the API key. You can find the API key in the user settings menu.
Copy your API key and paste it into the SFTP client.
Upload a local file to the remote object storage system.
You can find the uploaded file using the Lentiq File Browser.