Connecting Tableau to Lentiq
Tableau is a very popular data exploration tool that we love and that works nicely with Lentiq. The query engine is SparkSQL which uses Spark's in-memory mechanisms and query planner to execute SQL queries on data.
Prerequisites
- Have Tableau Desktop installed. If you don't already have one installed, a trial can be downloaded from the tableau.com website.
- Have a Lentiq account, a data pool provisioned and at least one table registered showing up in the Table Browser. For more information follow the working with data guide
1. Deploy the Spark SQL Application
From the Lentiq's left-hand application panel click on the SparkSQL icon.
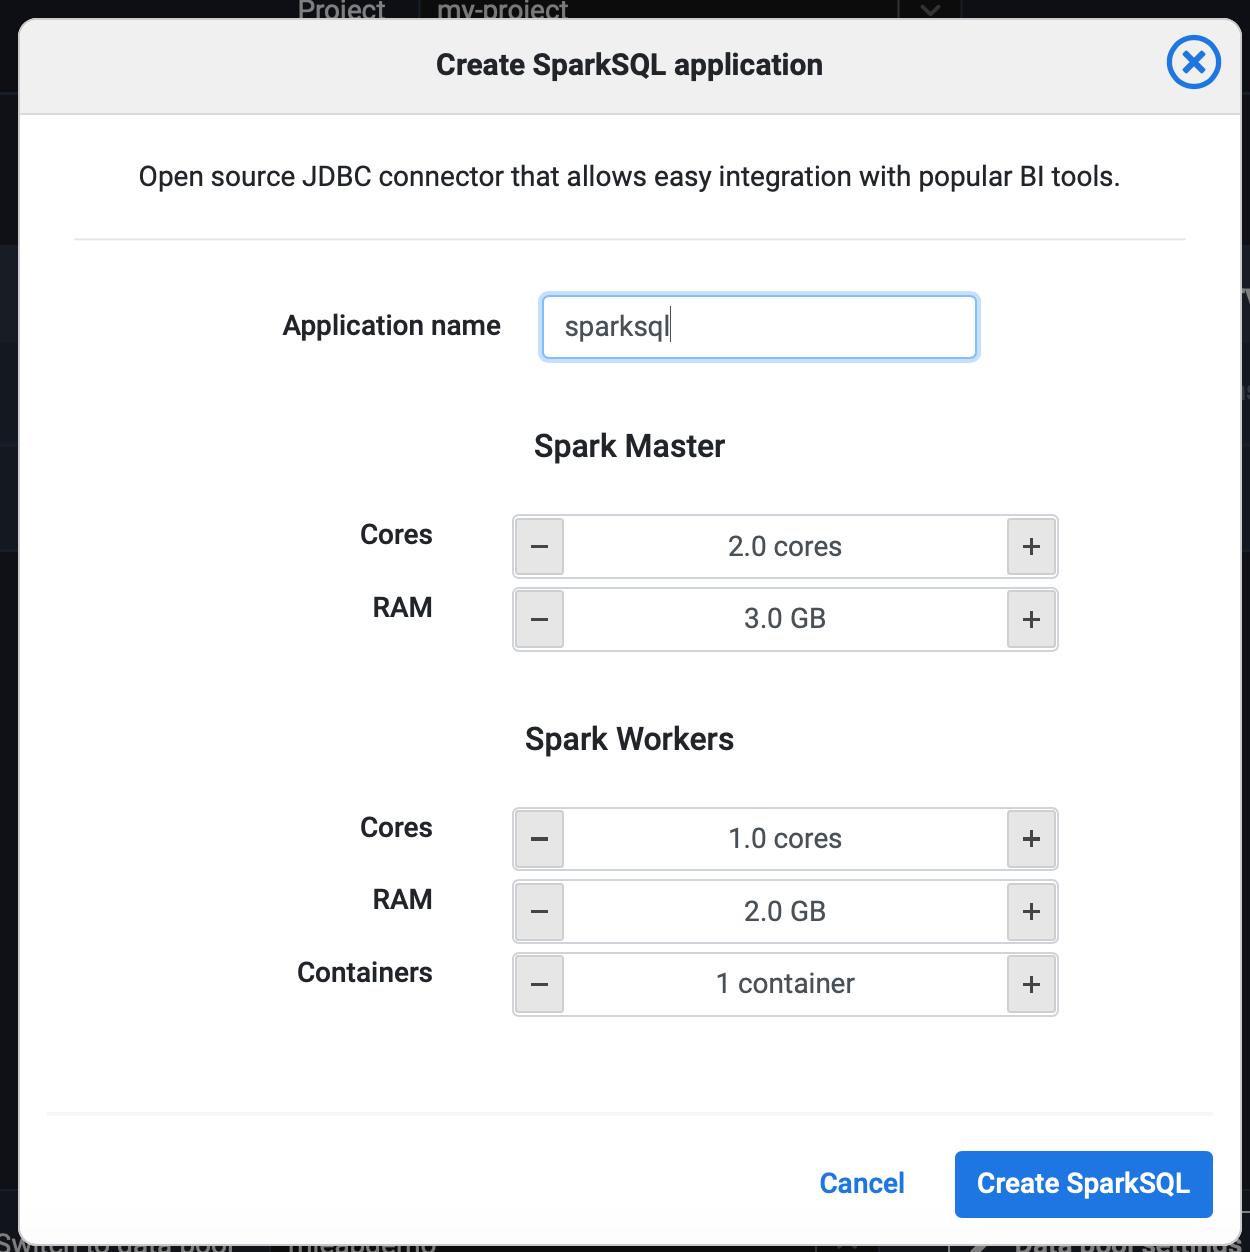
Note that the resources allocated can always be increased. You will want to increase these resources if multiple users use the same application or create separate applications for each user.
Make sure that the IP of the client connecting with Tableau is white-listed in the Firewall tab either at the application level or the data pool or project level.
Click Create Spark SQL and wait for it to be provisioned.
2. Download & install driver (optional)
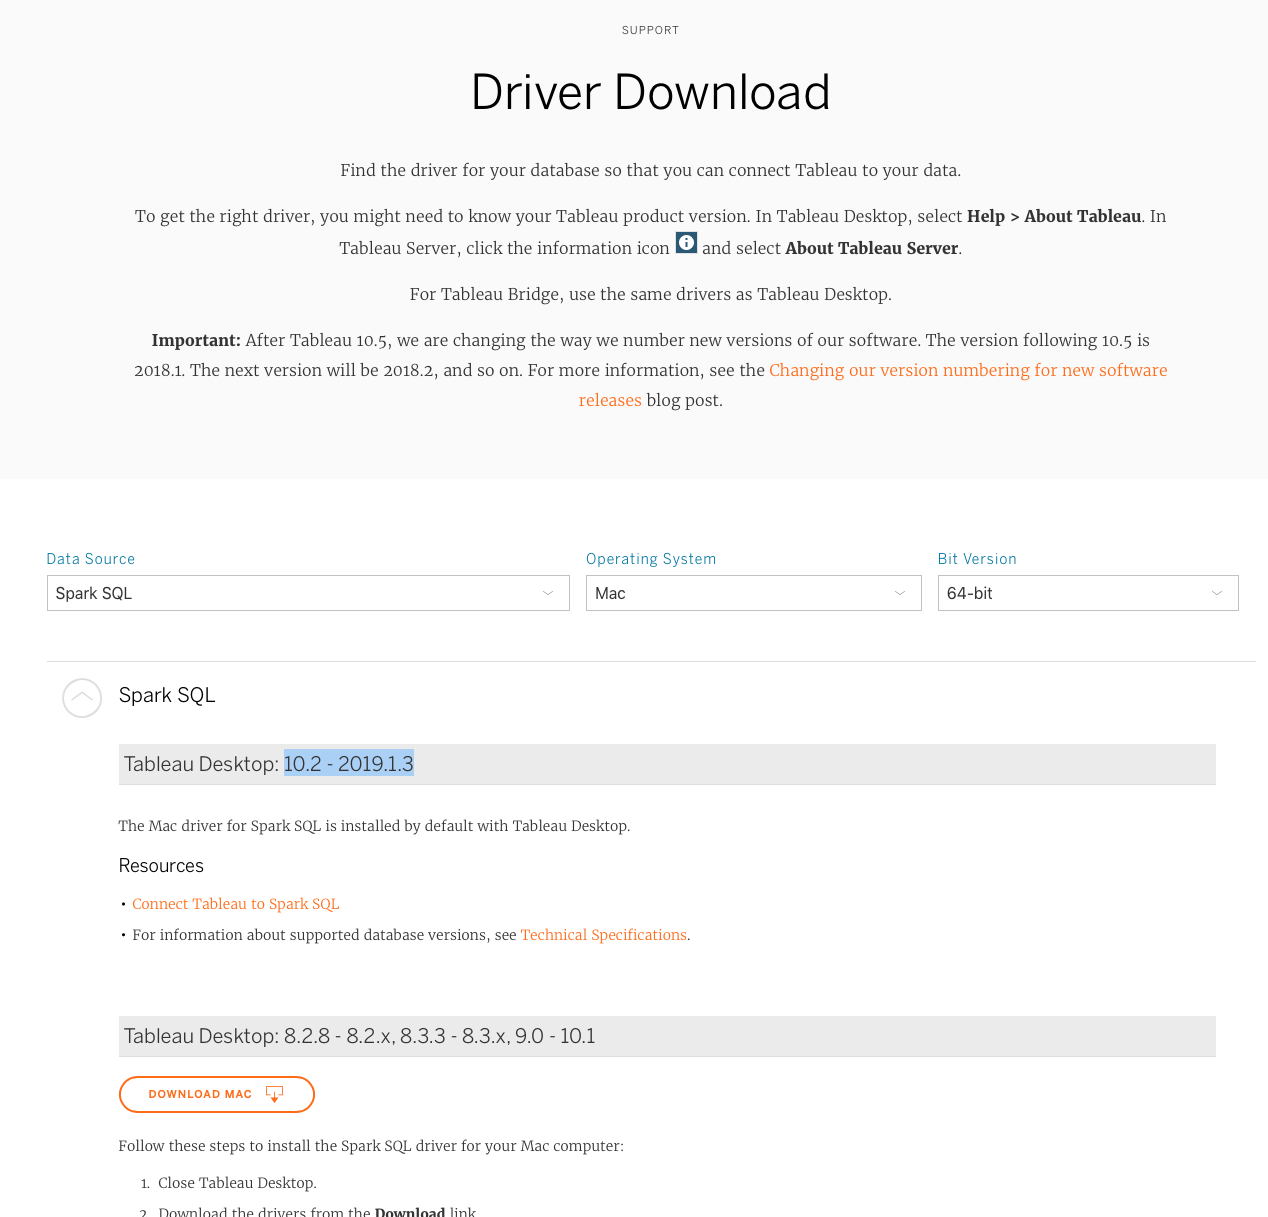
Tableau uses database drivers to connect to the various data sources. We will be using a driver called Simba Spark ODBC Driver to connect to our SparkSQL query engine, for both Mac and Windows. This driver is now shipped with Tableau starting 10.2 - 2019.1.3 version. If you use an older version follow the steps below. Otherwise, skip to step 3.
To download and install the driver:
- Navigate to Tableau Drivers page
- Search for Spark SQL
- Select your operating system and download the driver
- Follow on-screen instructions
3. Configure Connection details
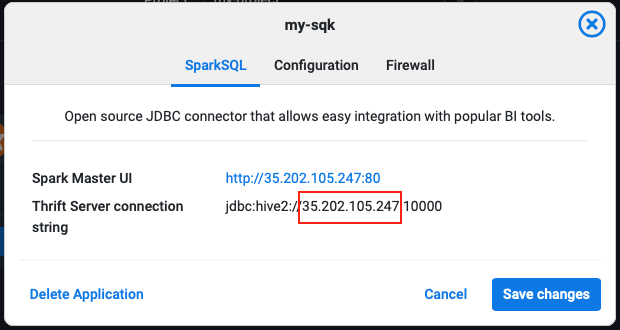
In the Dashboard click on the SparkSQL api's EDIT button and copy the IP to your clipboard or take a note of it. The port is always 10000.
3.1. Create ODBC DSN (Windows)
To specify connection details ODBC drivers use what's called a DSN which is a collection of settings.
Open ODBC Data Source Administrator (64 bit). You will need Administrator rights.
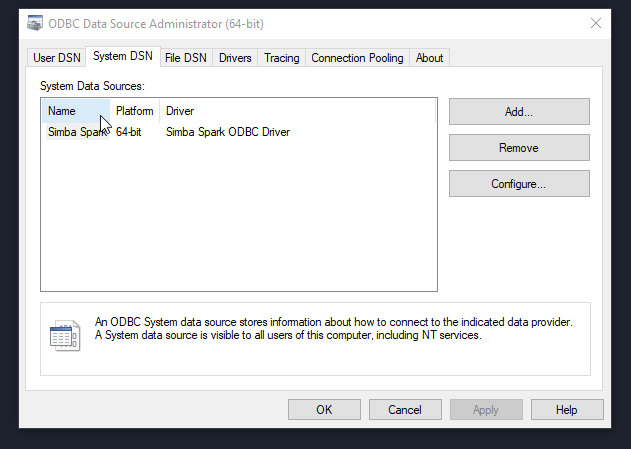
On the SystemDSN tab double click the Simba Spark DSN and configure the host field with the IP collected above.
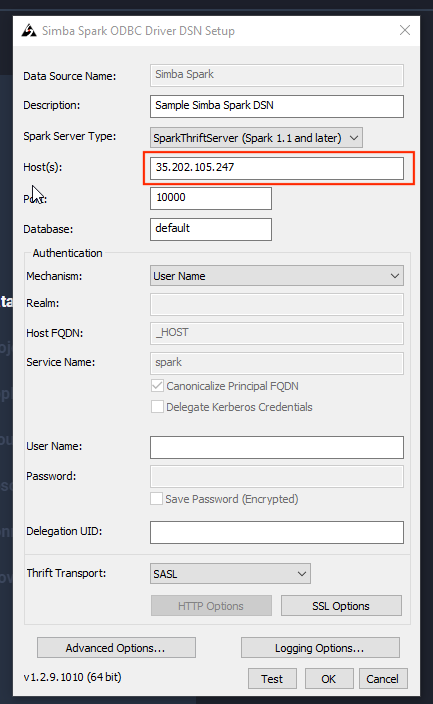
Click OK.
3.2 Create ODBC DSN (macOS)
On Mac edit the ~/Library/ODBC/odbc.ini file using vim or some other editor (you will need administrator rights):
sudo vim ~/Library/ODBC/odbc.ini
And append the following DSN configuration:
[ODBC Data Sources]
Lentiq=Simba Spark ODBC Driver

[Lentiq]
Driver=/Library/simba/spark/lib/libsparkodbc_sbu.dylib
Host=35.202.105.247
Port=10000
4. Configure Tableau data source
Now you need to tell Tableau to use our newly created DSN.
4.1 Configure Tableau data source (Windows)
- In Tableau go to the Connect to data page
- Select other ODBC Databases
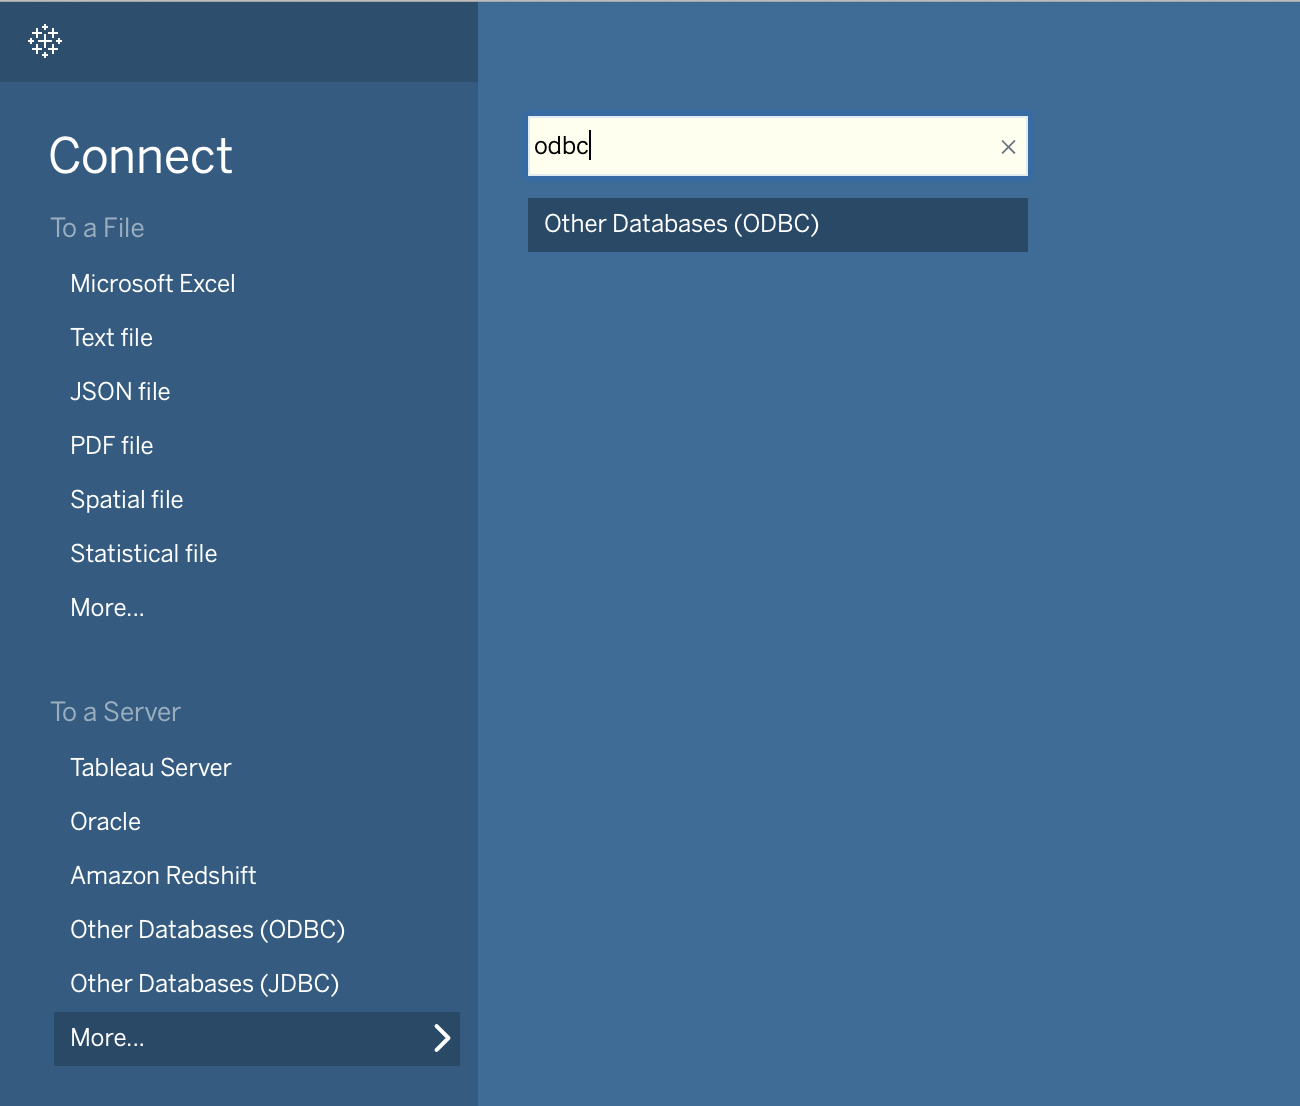
- Select the previously defined DSN from the dropdown (Lentiq).
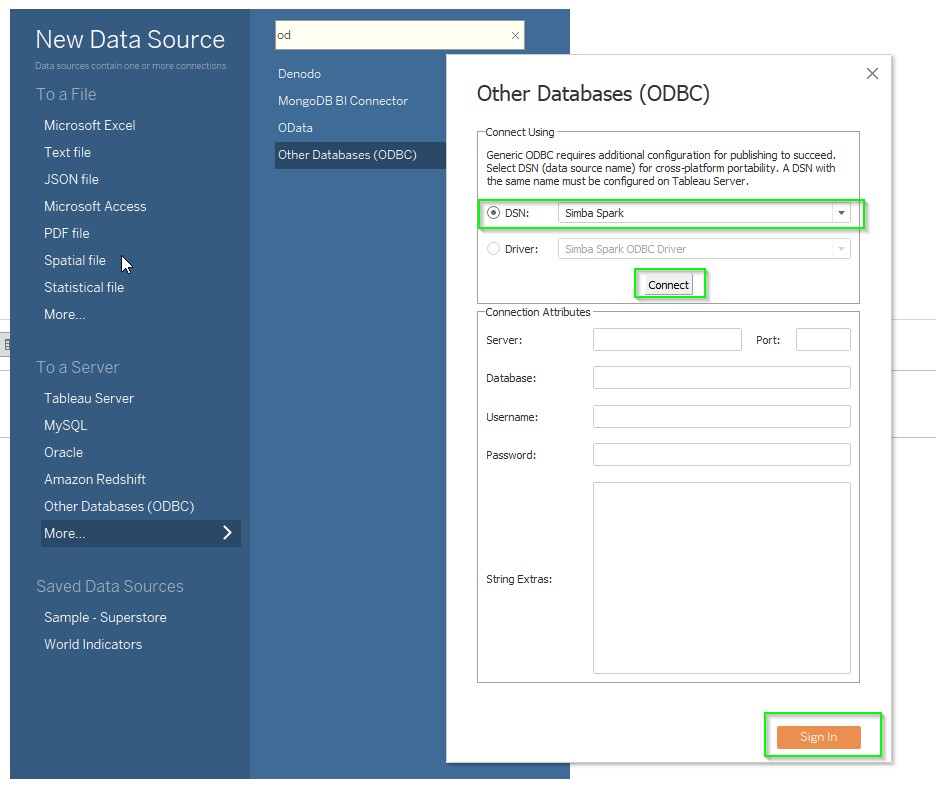
Click Connect and then click Sign in.
An executing query dialog will appear and it will take a while to execute. That is normal.
- In the Data Source view select the SPARK database and the default schema. If the schema does not appear in the dropdown click on the magnifying glass icon or type in the name of the schema.
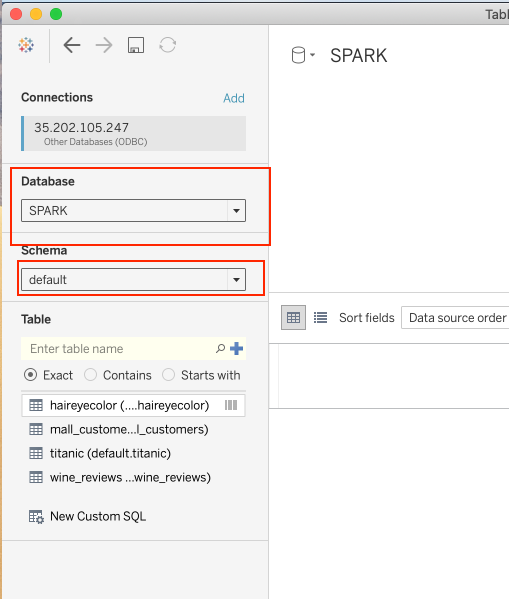
- Select tables of interest
Add tables of interest to your tableau sheets. If the tables do not appear in the list below click on the magnifying glass icon or type in the name of the table as it appears in Lentiq's table browser.
4.2 Configure Tableau data source (macOS)
- In Tableau go to the Connect to data page
- Select other ODBC Databases
- Select the previously defined DSN from the dropdown (Lentiq).

Click Sign in.
An executing query dialog will appear and it will take a while to execute. That is normal.
- In the Data Source view select the SPARK database and the default schema. If the schema does not appear in the dropdown click on the magnifing glass icon or type in the name of the schema.
- Select tables of interest
Add tables of interest to your tableau sheets.
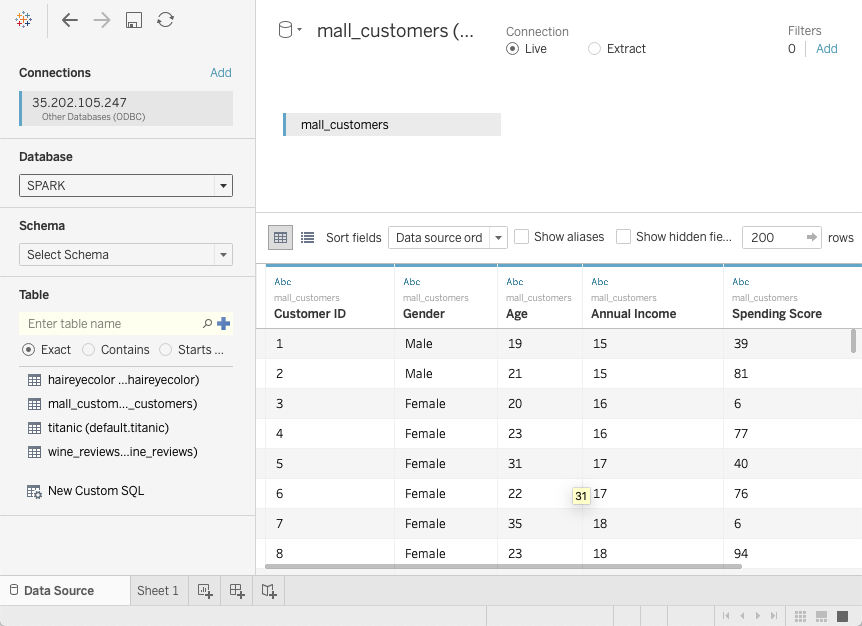
You can now browse and work with data in all tables in the data lake. The performance of the entire system is heavily dependent on the amount of resources you allocate to your SparkSQL query engine. Since spark caches data in RAM the very first interactions will be slower but subsequent ones should be fast.