Creating a reusable code block from a notebook
The easiest way to build a reusable Code Block is to simply convert a Jupyter notebook into one.
Writing the code
You can use exactly the same techniques you use for your typical notebooks. All outputs such as plots or cell outputs except those written to the data pool will be discarded so they can remain in place. They will be executed however thus we recommend commenting those cells before publishing the notebook.
simple_code_block_example.ipynb
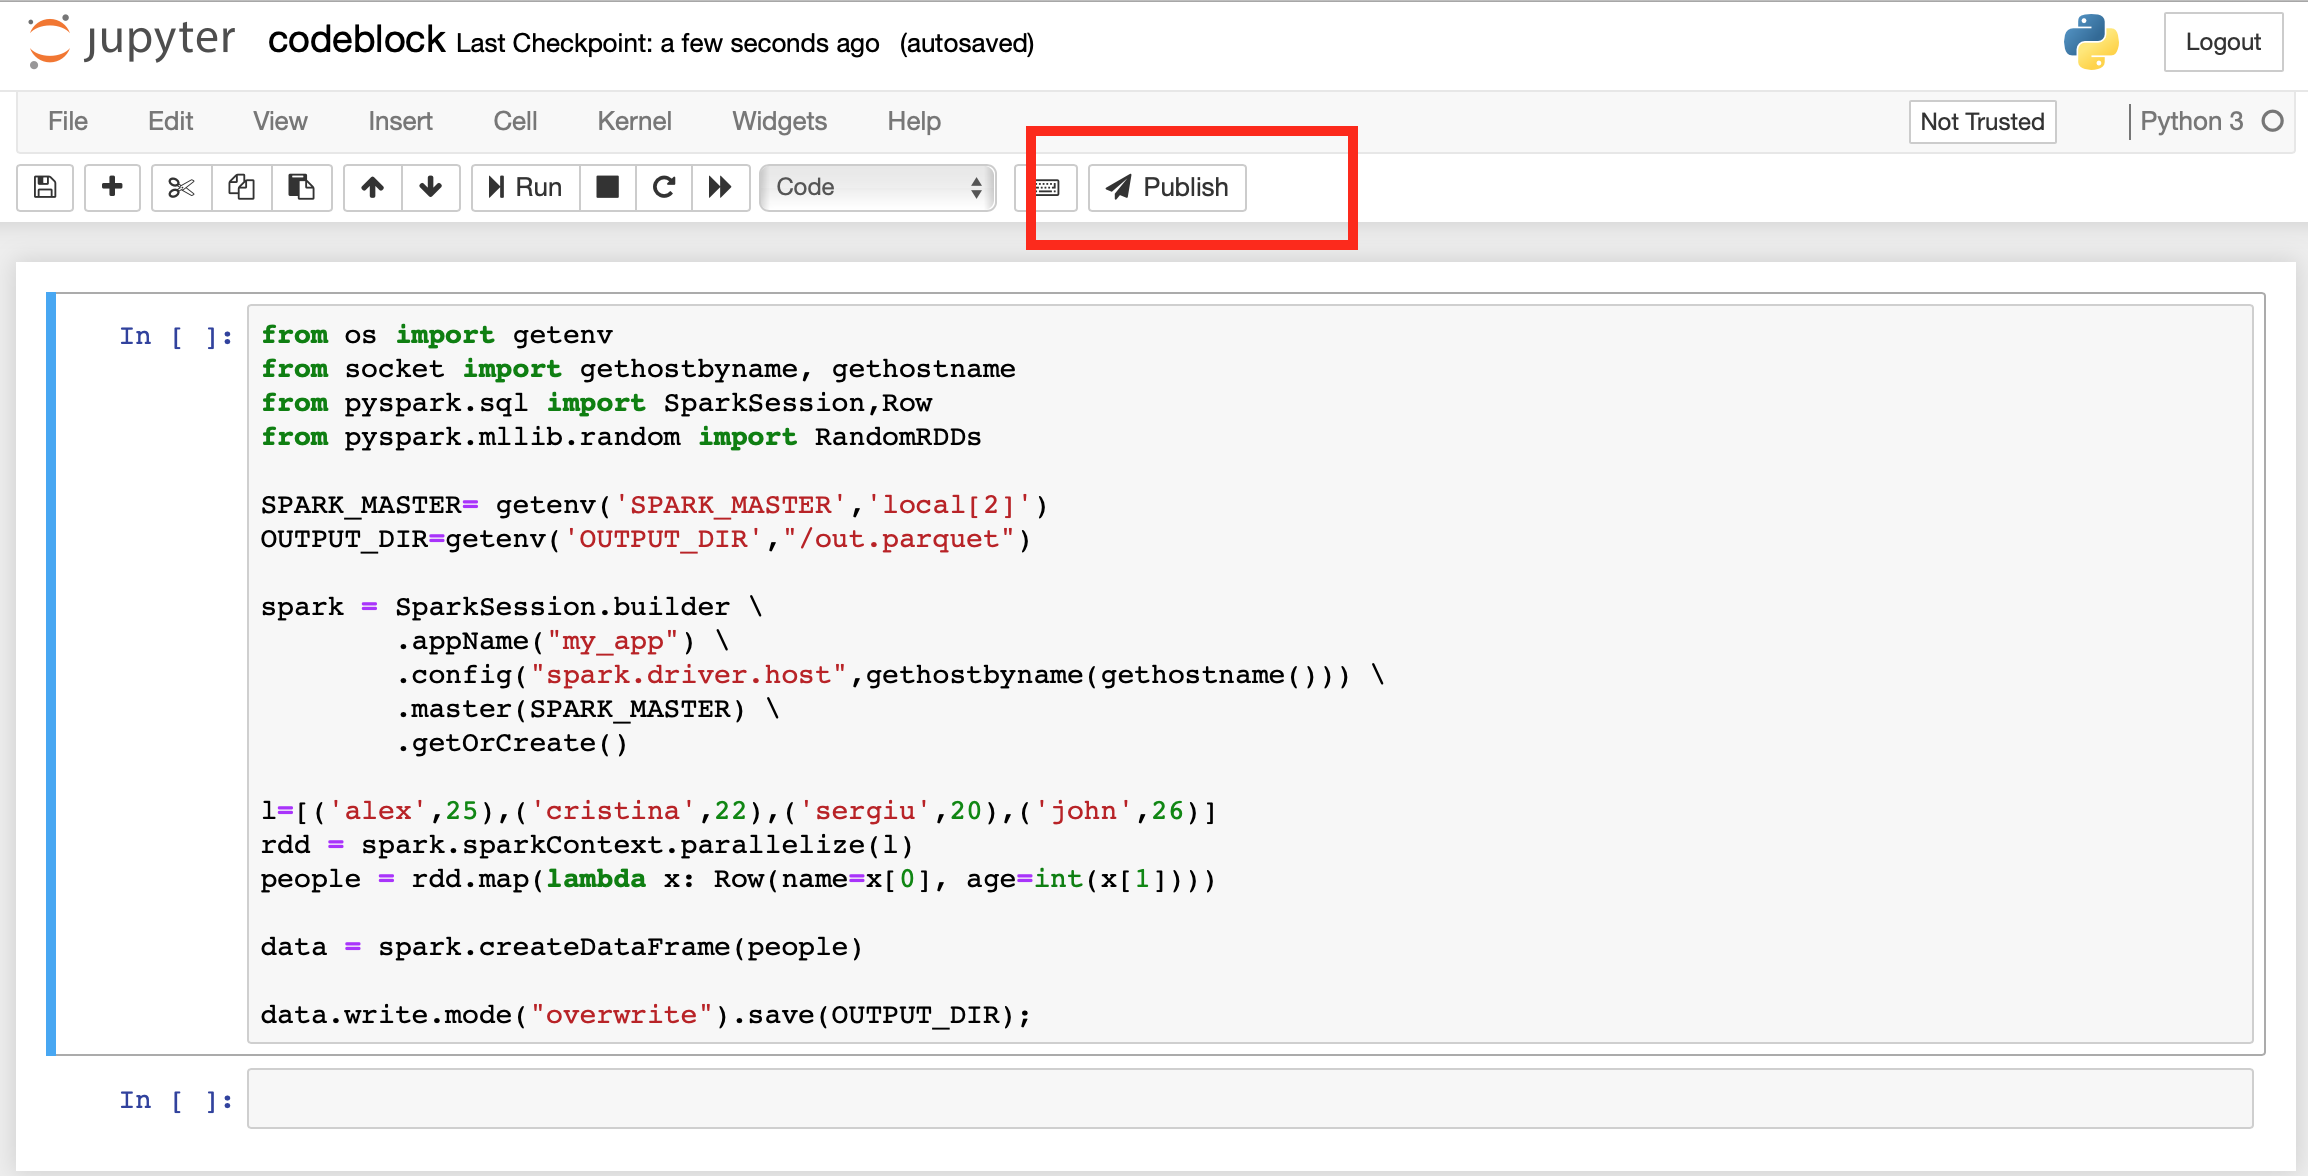
Or copy paste this into a cell:
from os import getenv
from socket import gethostbyname, gethostname
from pyspark.sql import SparkSession,Row
from pyspark.mllib.random import RandomRDDs

SPARK_MASTER = getenv('SPARK_MASTER', 'local[2]')
OUTPUT_DIR = getenv('OUTPUT_DIR', '/out.parquet')


spark = SparkSession.builder \
        .appName("my_app") \
        .config("spark.driver.host",gethostbyname(gethostname())) \
        .master(SPARK_MASTER) \
        .getOrCreate()

l=[('alex',25),('cristina',22),('sergiu',20),('john',26)]
rdd = spark.sparkContext.parallelize(l)
people = rdd.map(lambda x: Row(name=x[0], age=int(x[1])))

data = spark.createDataFrame(people)

data.write.mode("overwrite").save(OUTPUT_DIR);
Making the notebook reusable
Since code blocks are reusable and the code cannot be modified once the code block has been created, in order for the next person to adapt it to his or hers environment, instead of hard-coding parameters the notebook should be read from environment variables.
SPARK_MASTER = getenv('SPARK_MASTER', 'local[2]')
OUTPUT_DIR = getenv('OUTPUT_DIR', '/out.parquet')
Notice the following environment variables and their default values.
Note: The
.config("spark.driver.host",gethostbyname(gethostname())) \line is needed because the Task will not have a publicly resolvable DNS which prevents spark driver from being discoverable to the spark workers. This will not be required in a future release.
Publishing the notebook
Publish the notebook by clicking on the publish button.
Note that you can re-publish a notebook if you wish but the code-block will not be automatically recreated. You need to manually re-create the code block.
Create the reusable code block
Let's now use the published notebook to create a Code Block:
- Click on the Code Blocks page.
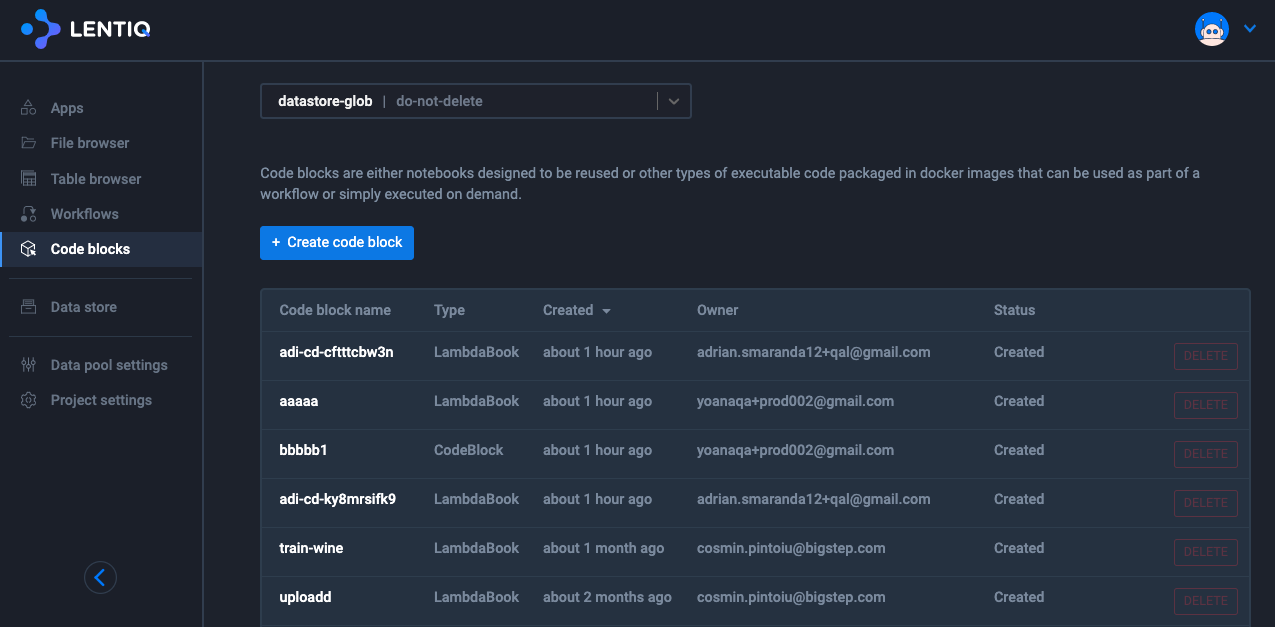
- Click on the Create Code Block button
- Give it a name, select the previously published notebook from the dropdown.
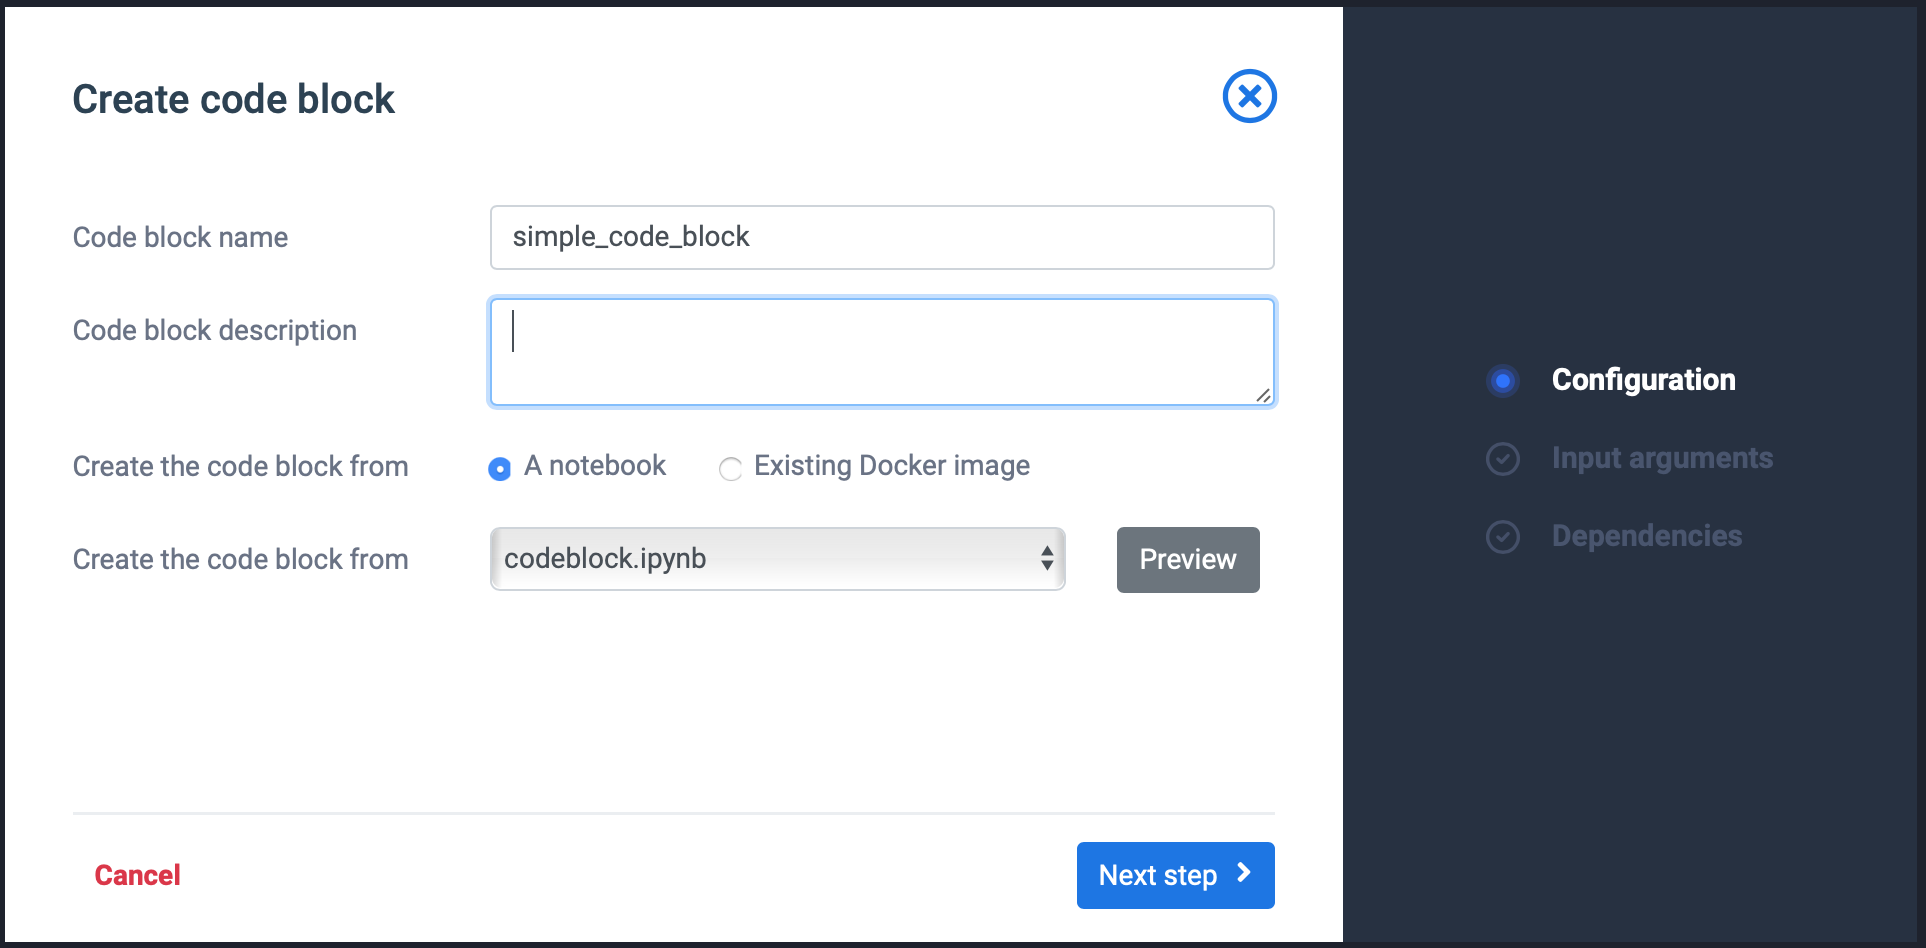
- Click Next Step
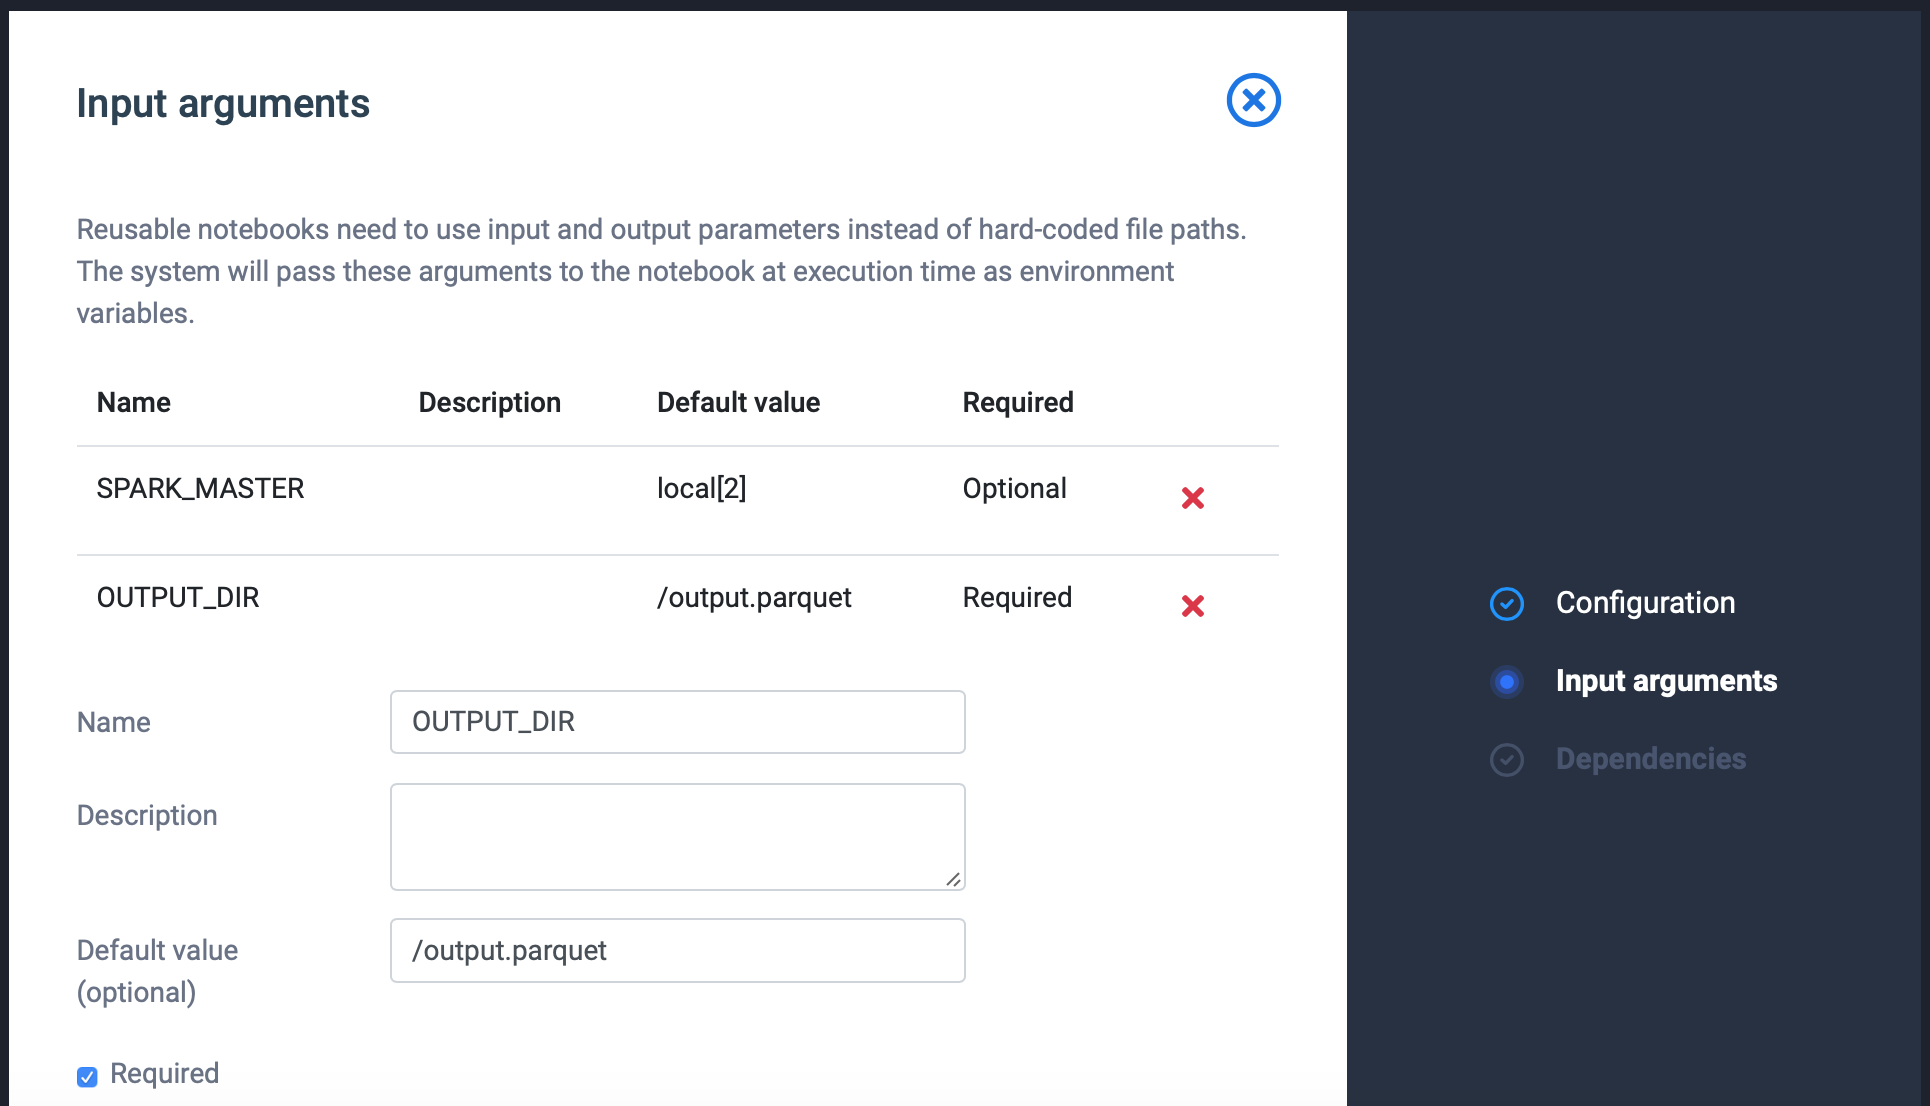
- For each input parameter (SPARK_MASTER and OUTPUT_DIR) add a parameter: Set required the flag only for the OUTPUT_DIR. Use the default values available in code and write a meaning full description.
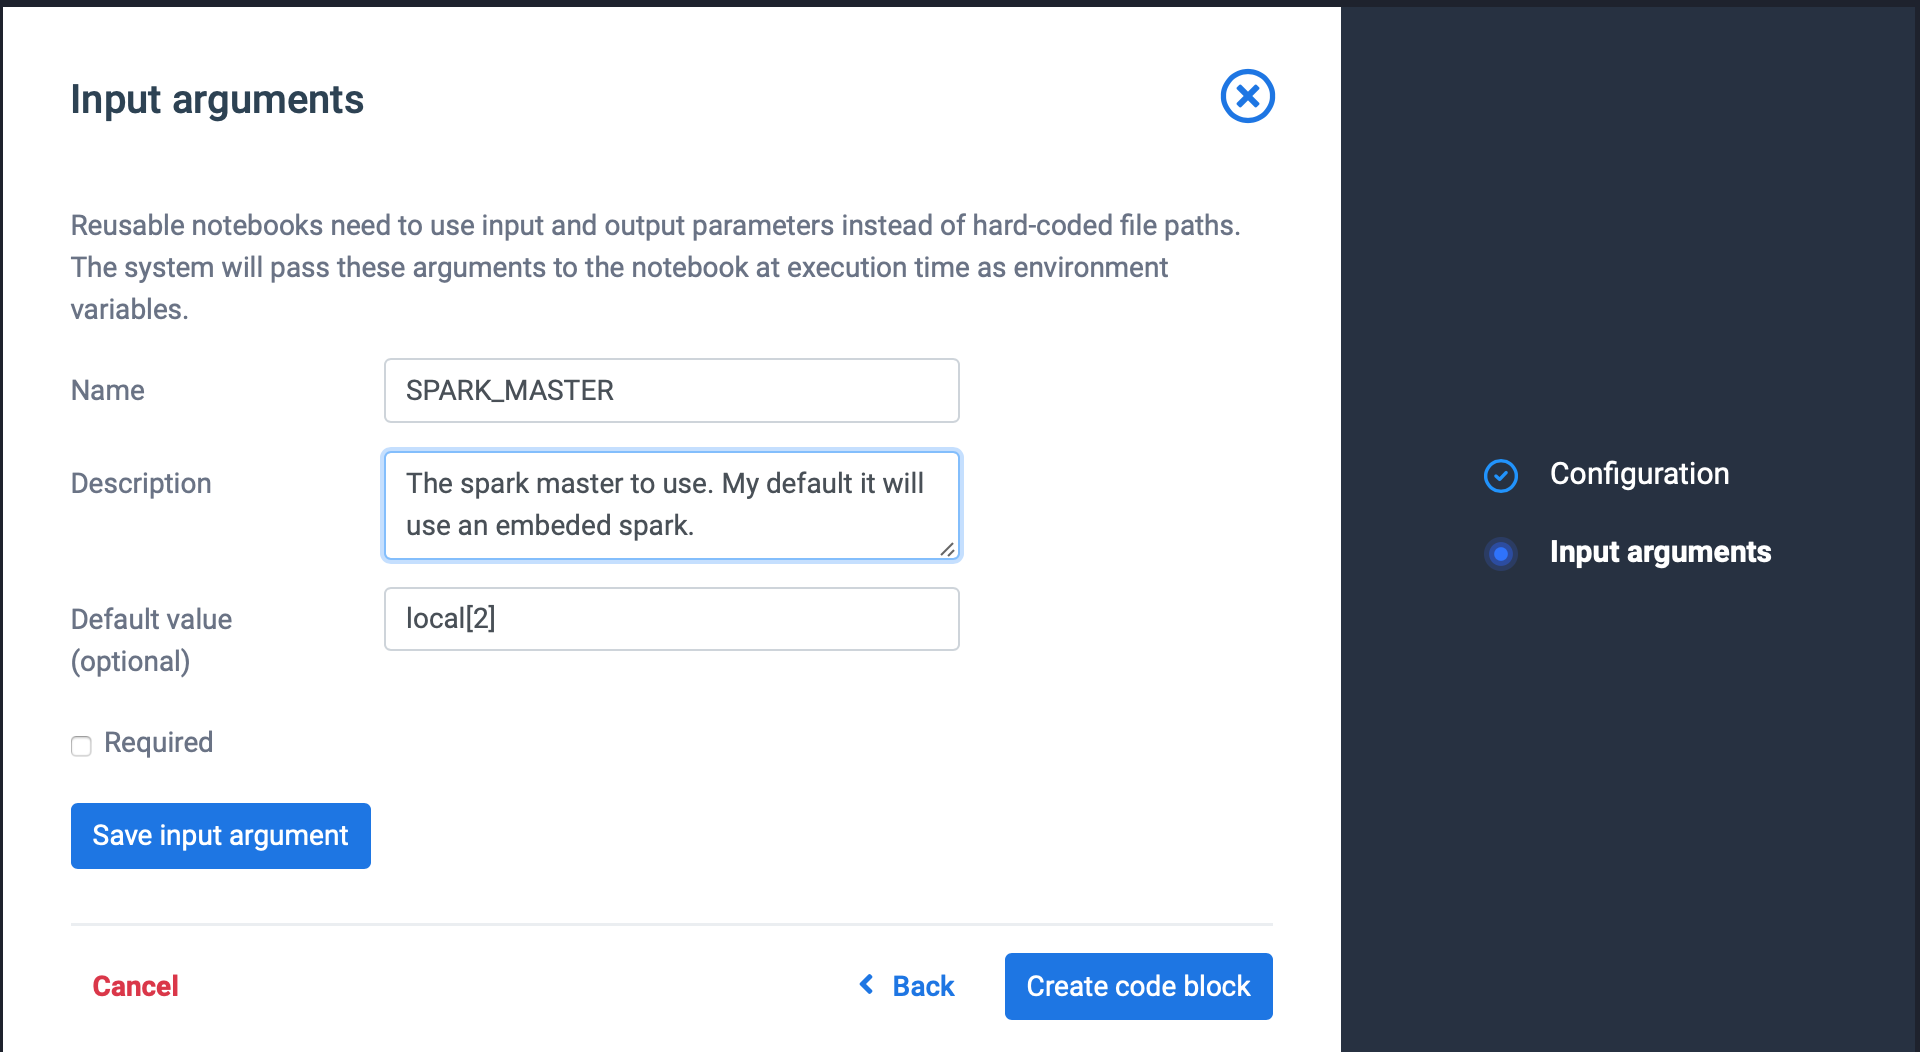 Click save input argument when ready. Repeat step 5 until you have specified all input arguments.
- Click Next Step Input your task's dependencies. If you had to install any python or operating system library using pip or apt-get install this is where you need to enter it. These steps will be executed as part of the build process and the packages will be available in the code final block.
- Click Create Code Block